Add Live Activities to Your iOS App in 5 Steps
The second part of a series on Live Activities.
- What are iOS Live Activities and Four Kinds of Presentations
- Add Live Activities to Your iOS App in 5 Steps
- Start and Update iOS Live Activities With Push Notifications
- Start and Update iOS Live Activities With Broadcast Push Notifications
Step1. Create a Widget Extension with “Include Live Activity”
Create a widget extension if you haven’t added one to your app and make sure to select “Include Live Activity”.
Xcode -> File -> New -> Target... , select Widget Extension
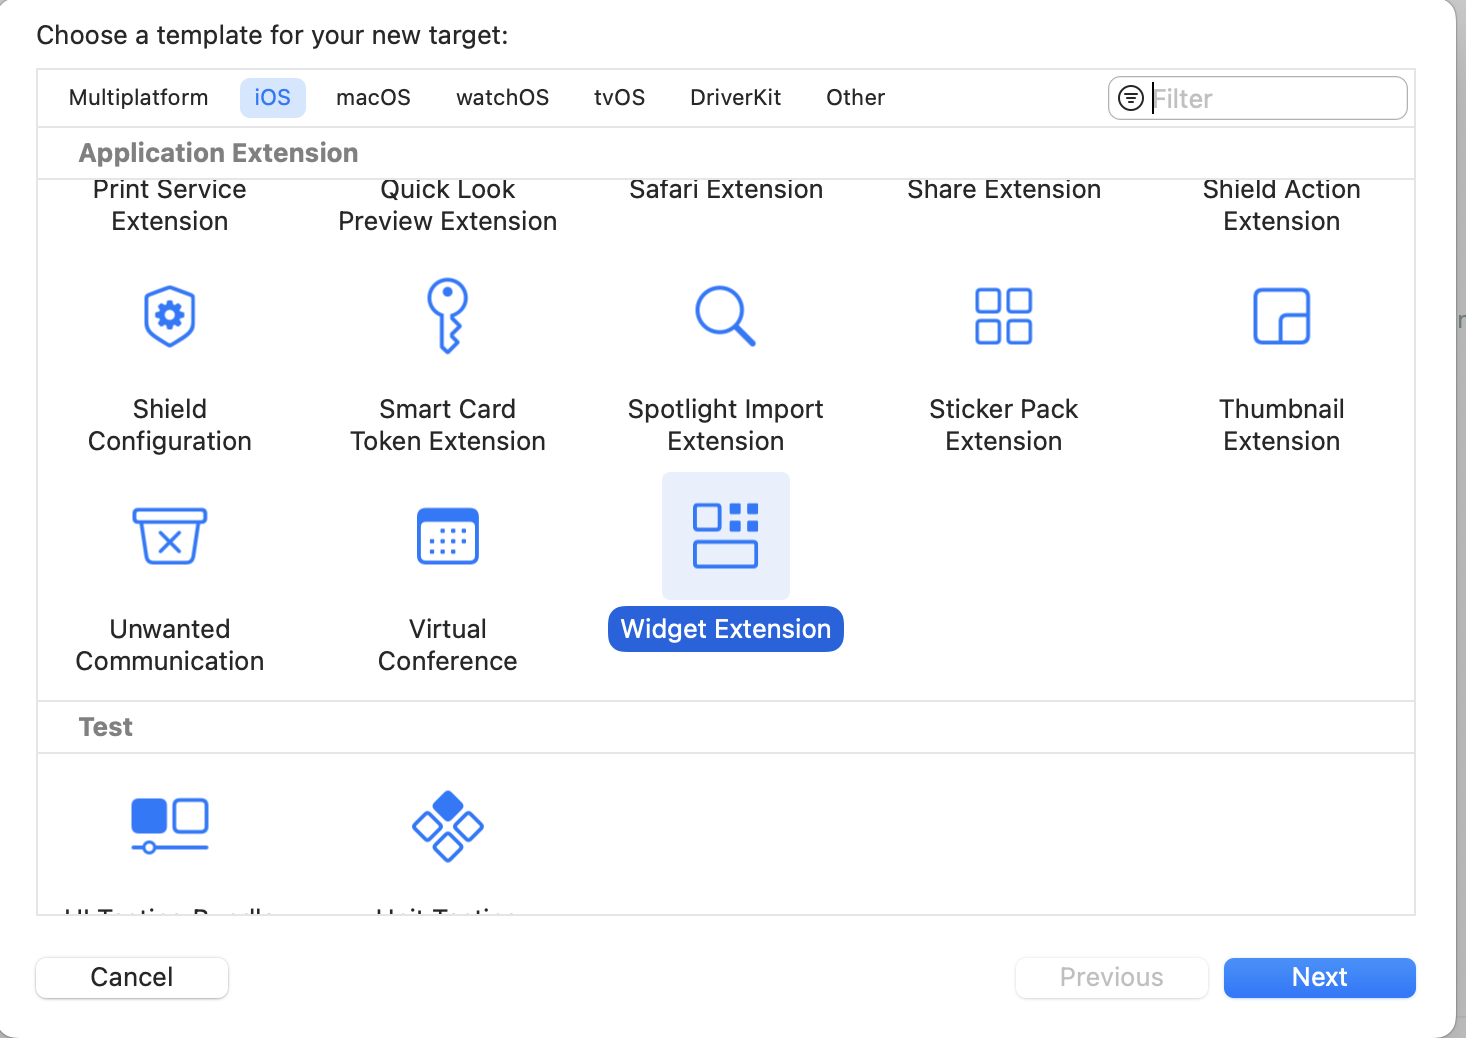
Click Next
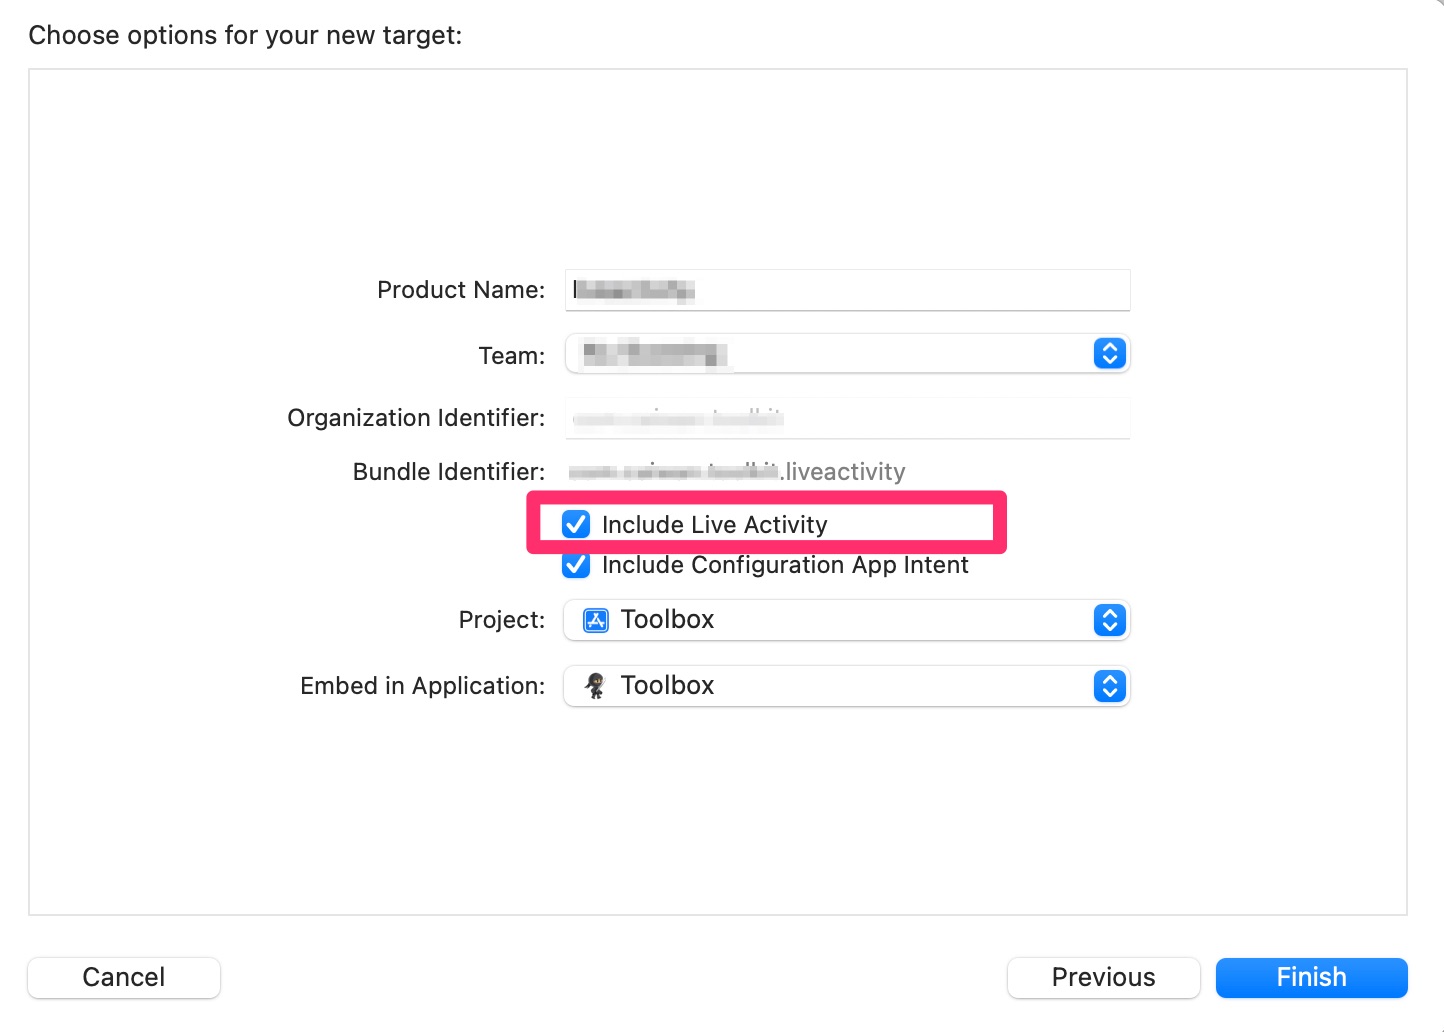
Make sure to select “Include Live Activity” , then Click Finish.
Step2. Add Info.Plist Entries to Your Main Targets
Add the NSSupportsLiveActivities key, set its value to
true.Optionally, Add NSSupportsLiveActivitiesFrequentUpdates key, set its value to
true.
<key>NSSupportsLiveActivities</key>
<true/>
<key>NSSupportsLiveActivitiesFrequentUpdates</key>
<true/>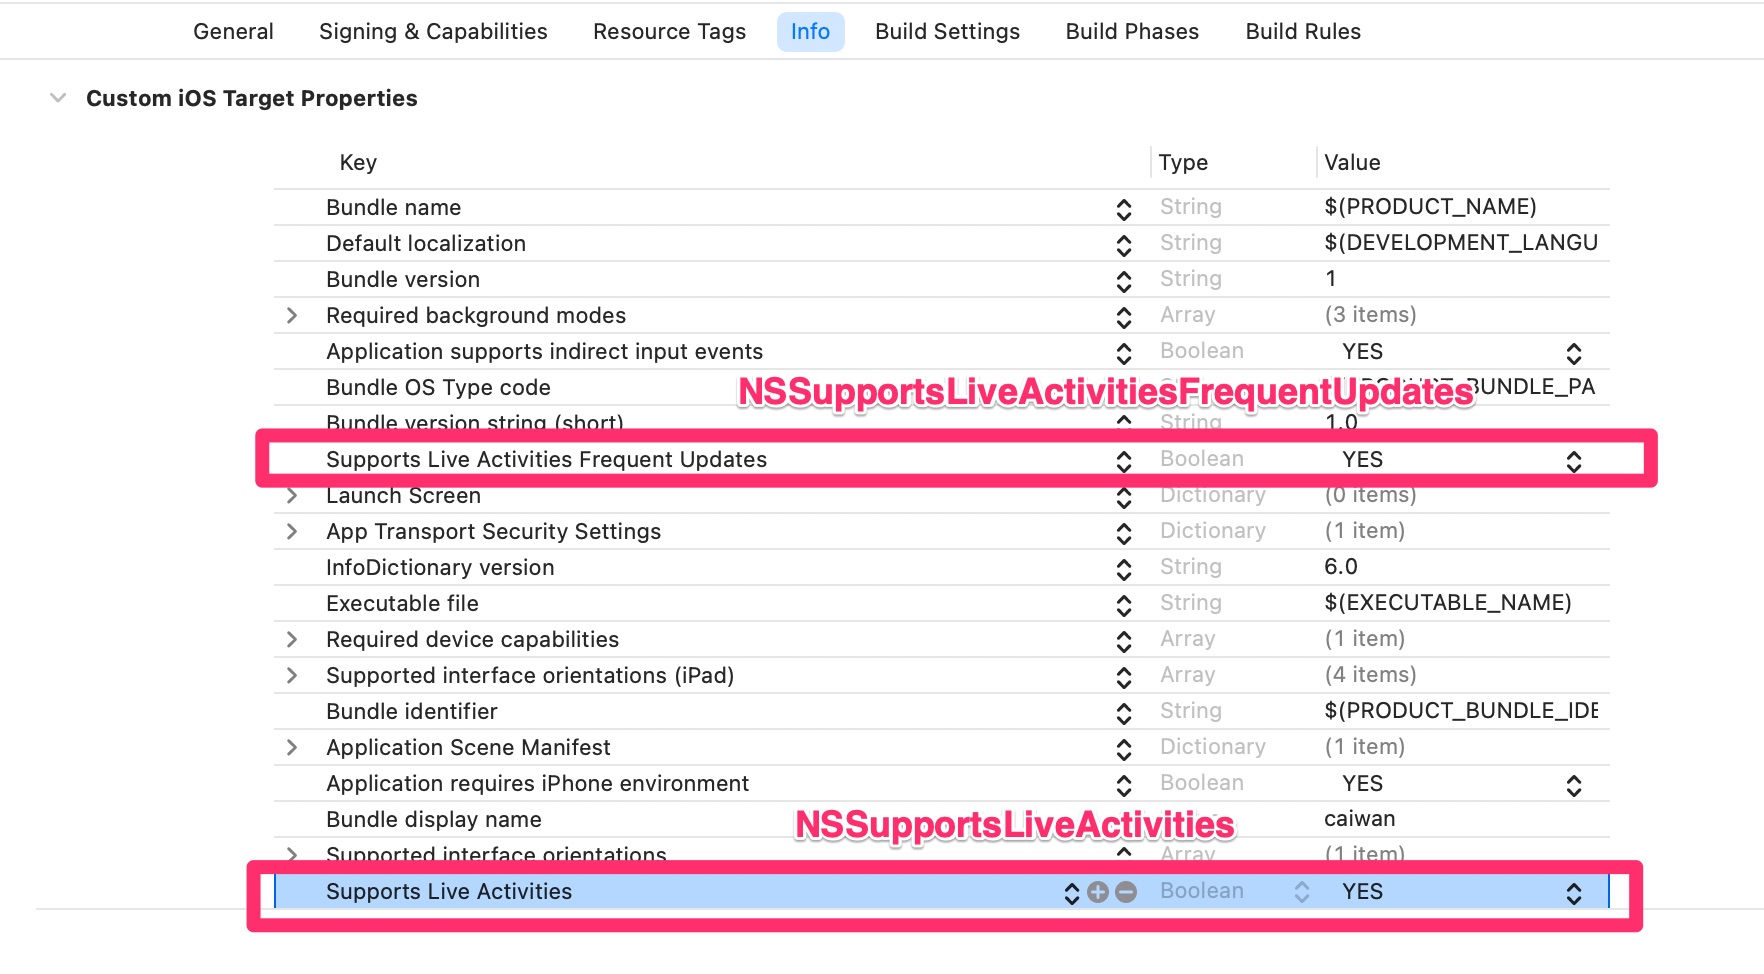
Step3. Define the Static and Dynamic Data of Your Live Activity
The ActivityAttributes protocol describes the content that appears in your Live Activity.
An ActivityAttributes model include static data that doesn't change in the lifecycle of one Live Activity and dymanic data that changes over time, and this dynamic data can also be updated by Live Activity push notifications.
The inner ContentState type of ActivityAttributes represent the dynamic data.
In the following Xcode default live activity template code example, emoji is the dynamic data, and name is the static data.
import ActivityKit
import WidgetKit
import SwiftUI

struct LiveActivityAttributes: ActivityAttributes {
    public struct ContentState: Codable, Hashable {
        // Dynamic stateful properties about your activity go here!
        var emoji: String
    }

    // Fixed non-changing properties about your activity go here!
    var name: String
}
Step4. Add Live Activities UI to the widget extension
After you define the data that appears in the Live Activity with the ActivityAttributes structure, add code to return an ActivityConfiguration in your widget implementation.
The following example is the Xcode default live activity template code. It defines four kinds of UI style,including:
- Lock Screen UI
- Dynamic Island Expanded UI
- Dynamic Island Compact UI
- Dynamic Island Minimal UI
INFO
You can look at What are iOS Live Activities to see what the four UIs look like.
struct LiveActivityLiveActivity: Widget {
    var body: some WidgetConfiguration {
        ActivityConfiguration(for: LiveActivityAttributes.self) { context in
            // Lock screen/banner UI goes here
            VStack {
                Text("Hello \(context.state.emoji)")
            }
            .activityBackgroundTint(Color.cyan)
            .activitySystemActionForegroundColor(Color.black)

        } dynamicIsland: { context in
            DynamicIsland {
                // Expanded UI goes here.  Compose the expanded UI through
                // various regions, like leading/trailing/center/bottom
                DynamicIslandExpandedRegion(.leading) {
                    Text("Leading")
                }
                DynamicIslandExpandedRegion(.trailing) {
                    Text("Trailing")
                }
                DynamicIslandExpandedRegion(.bottom) {
                    Text("Bottom \(context.state.emoji)")
                    // more content
                }
            } compactLeading: {
                Text("L")
            } compactTrailing: {
                Text("T \(context.state.emoji)")
            } minimal: {
                Text(context.state.emoji)
            }
            .widgetURL(URL(string: "http://www.apple.com"))
            .keylineTint(Color.red)
        }
    }
}
Step5. Start/Update/End a Live Activity in Your App
Start a Live Activity
You can only start a Live Activity in your app when the app is in the foreground.
Pass the ActivityAttributes , ActivityContent and optional PushType (.token) parameters to request(attributes:content:pushType:) function
INFO
With the PushType(.token), you can get a push token after the activity is created, Then, you can use the push token to update or end this activity using ActivityKit push notifications.
func startActivity() {
    guard ActivityAuthorizationInfo().areActivitiesEnabled else {
        print("You can't start live activity.")
        return
    }

    do {
        let atttribute = LiveActivityAttributes(name:"APNsPush")
        let initialState = LiveActivityAttributes.ContentState(emoji: "😇")
        let activity = try Activity<LiveActivityAttributes>.request(
            attributes: atttribute,
            content: .init(state:initialState , staleDate: nil),
            pushType: .token
        )
        self.currentActivity = activity
    } catch {
        print(error)
    }
}
TIP
If your live activity view doesn't show after starting a live activity, try rebooting your device and trying again.
Update a Live Activity
When you start a Live Activity, you can update the data of the Live Activity using the update(_:) method of the Activity object you received when you started the Live Activity.
You can update or end a Live Activity from your app while it runs in the background — for example, by using Background Tasks.
For important updates, use the update(_:alertConfiguration:) function to display an alert on iPhone, iPad, and a paired Apple Watch that tells a person about new Live Activity content.
- On Apple Watch, the system uses the
titleandbodyattributes for the alert. - On iPhone and iPad with the Dynamic Island, the system shows the expanded Live Activity in the Dynamic Island.
- On iPhone and iPad without the Dynamic Island, the system shows the Lock Screen presentation as a banner when your app is not in the foreground. If you app is in the foreground, the system only vibrates without displaying the banner UI.
func updateActivity(alert:Bool) {
    Task {
        guard let activity = currentActivity else {
            return
        }

        var alertConfig: AlertConfiguration? = nil
        let contentState: LiveActivityAttributes.ContentState = LiveActivityAttributes.ContentState(emoji: "🥰")

        if alert {
            alertConfig = AlertConfiguration(title: "Emoji Changed", body: "Open the app to check", sound: .default)
        }

        await activity.update(ActivityContent(state: contentState, staleDate: Date.now + 15, relevanceScore: alert ? 100 : 50), alertConfiguration: alertConfig)
    }
}
End a Live Activity
You can end a Live Activity using the end(_:dismissalPolicy:) method of the Activity object you received when you started the Live Activity.
Always include an updated Activity.ContentState to ensure the Live Activity shows the latest and final content update after it ends. This is important because the Live Activity can remain visible on the Lock Screen for some time after it ends.
A Live Activity that ended remains on the Lock Screen until the person removes it or the system removes it automatically. The automatic removal depends on the dismissal policy you provide to the end(_:dismissalPolicy:) function.
There are three kinds of dismissal policies you can use:
default
With thedefaultdismissal policy, the Live Activity appears on the Lock Screen for some time after it ends to allow a person to glance at their phone to see the latest information.
A person can choose to remove the Live Activity at any time, or the system removes it automatically four hours after it ended.immediate
With theimmediatedismissal policy, the Live Activity will be removed from Lock Screen immediately.after(_:)
Alternatively, use after(_:) to specify a date within a four-hour window.
The system removes the ended Live Activity after the given date or after four hours from the moment the Live Activity ended — whichever comes first.
func endActivity(dismissTimeInterval: Double?) {
    Task {
        guard let activity = currentActivity else {
            return
        }
        let finalState = LiveActivityAttributes.ContentState(emoji: "✋✋")
        let dismissalPolicy: ActivityUIDismissalPolicy
        if let dismissTimeInterval = dismissTimeInterval {
            if dismissTimeInterval <= 0 {
                dismissalPolicy = .immediate
            } else {
                dismissalPolicy = .after(.now + dismissTimeInterval)
            }
        } else {
            dismissalPolicy = .default
        }

        await activity.end(ActivityContent(state: finalState, staleDate: nil), dismissalPolicy: dismissalPolicy)
    }
}
Demo
Have any questions? Feel free to drop me a message on Twitter!