How to Integrate Apple Pay into iOS App
Step 1: Create a merchant identifier
A merchant identifier uniquely identifies you to Apple Pay as a merchant who is able to accept payments. A merchant identifier never expires, and you can use the same one for multiple apps.
You can create a merchant identifier on Apple Developer Portal.
Certificates, IDs & Profiles > Identifiers > + > Register a new identifier
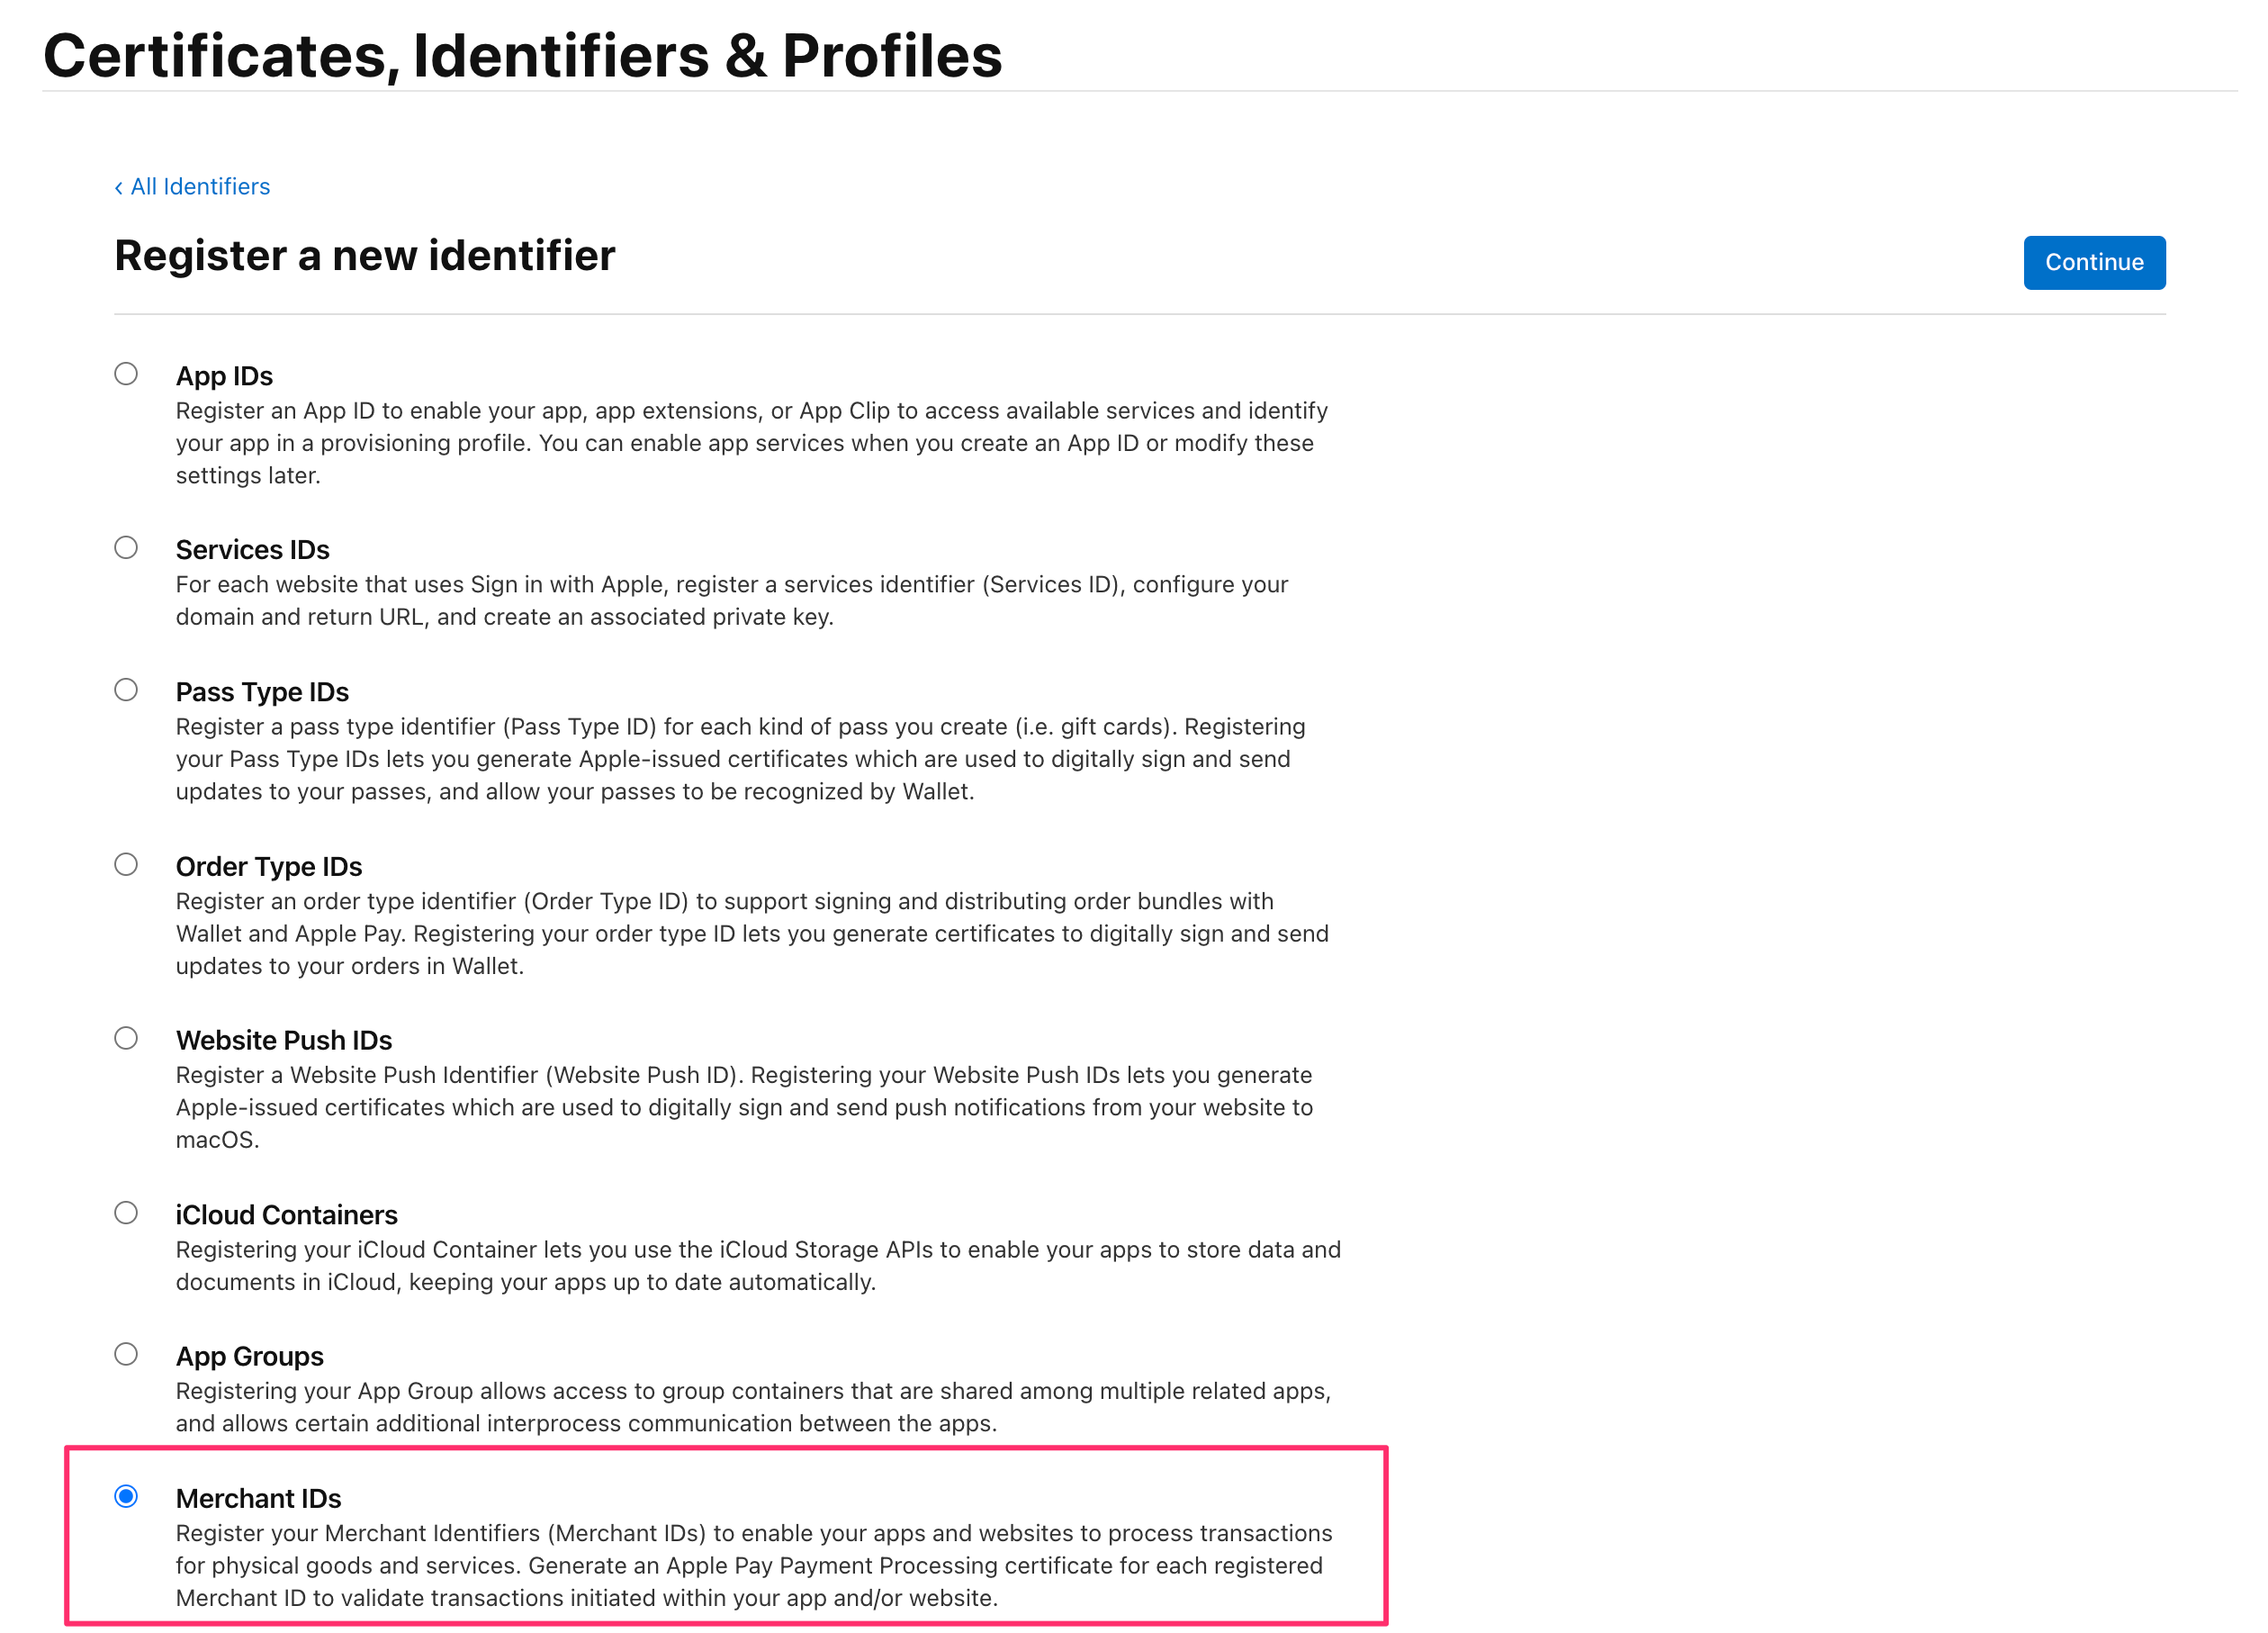


Alernatively, you can create a merchant identifier in Xcode following Step 2.
Step2: Enable Apple Pay capability in Xcode
Xcode Project > Target > Signing & Capabilities > + Capabilities -> Apple Pay
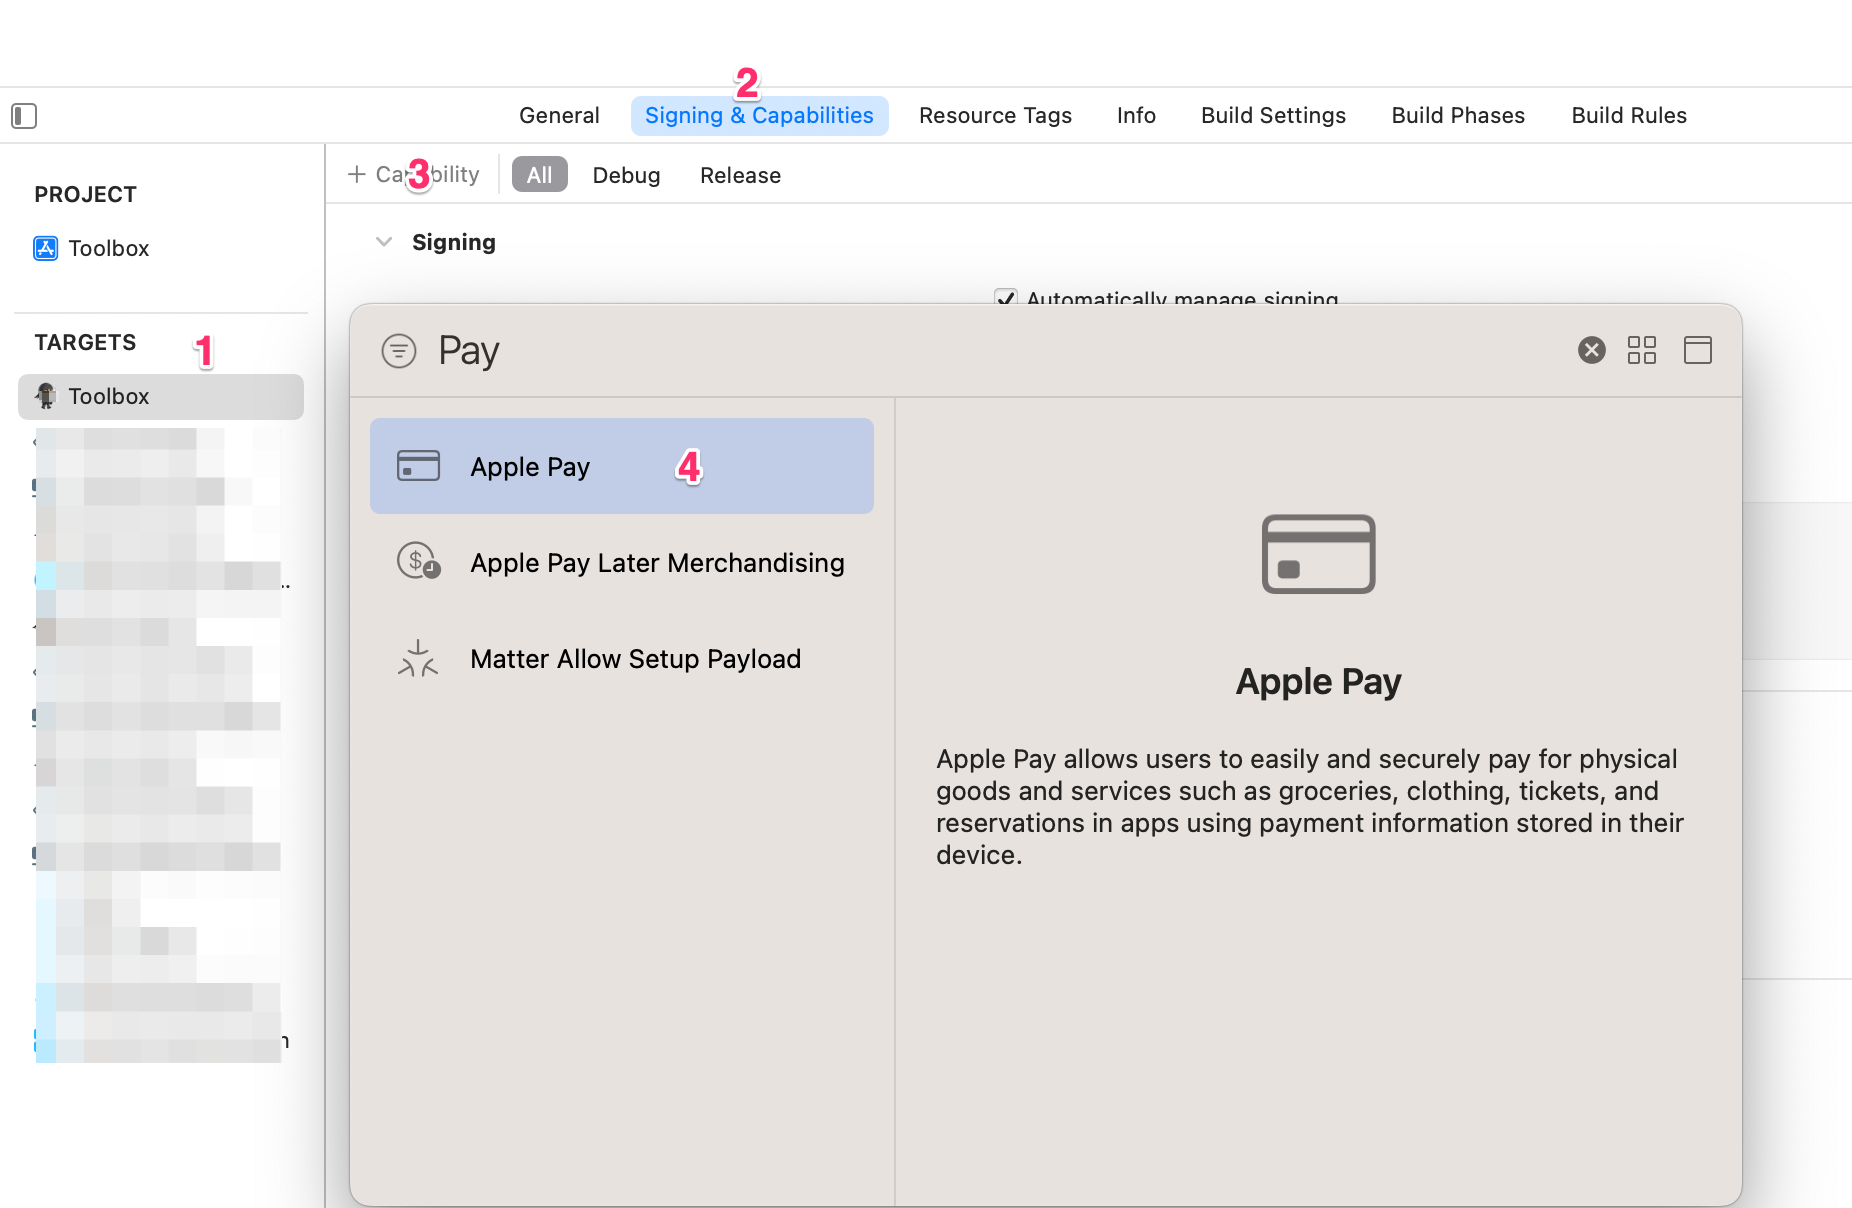
If you have created merchant identifiers in your developer account, Xcode will retrieve any existing merchant identifiers from your developer account and displays them in the capability’s Merchant IDs list.

If you haven't create a merchant identifier yet, you can click the Add button (+) below the Merchant IDs list and enter a merchant identifier in the dialog that appears. Xcode recommends to prefix a merchant identifier with merchant.
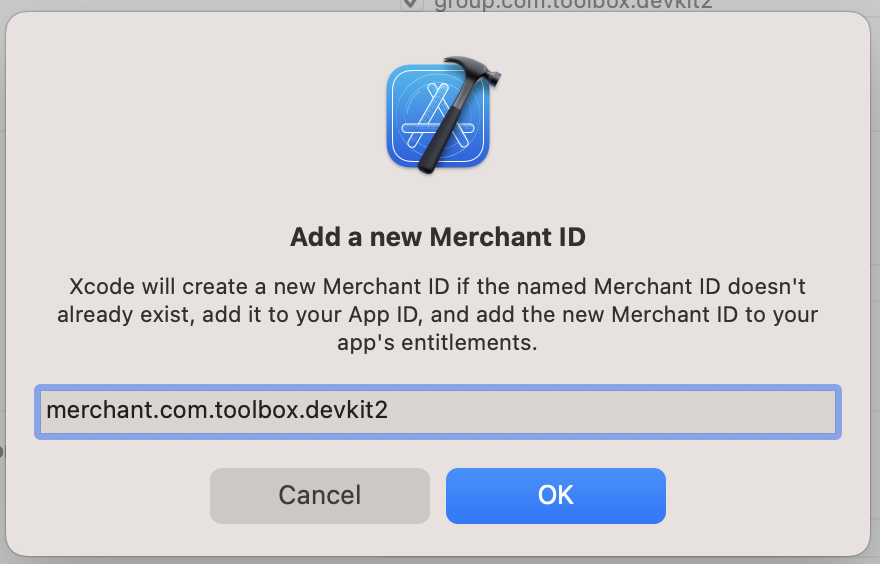
Click OK to save the new merchant identifier, and Xcode automatically registers the merchant identifier in the developer portal, adds it to your target’s entitlements file, and selects it in the Merchant IDs list, indicating that your app is now able to use the new merchant identifier.

Step3: Create a payment processing certificate
A payment processing certificate is a digital certificate that secures transaction data and proves its origin.
The Apple Pay servers use the certificate’s public key to encrypt payment data, and you or your payment service provider use the certificate’s private key to decrypt the data and process the payment.
You can create a merchant identifier on Apple Developer Portal under the merchant identifier.
- Certificates, IDs & Profiles > Identifiers > Filter & Select Your Merchant ID

- Agree the Apple Pay Platform Web Merchant Terms and Conditions if needed.
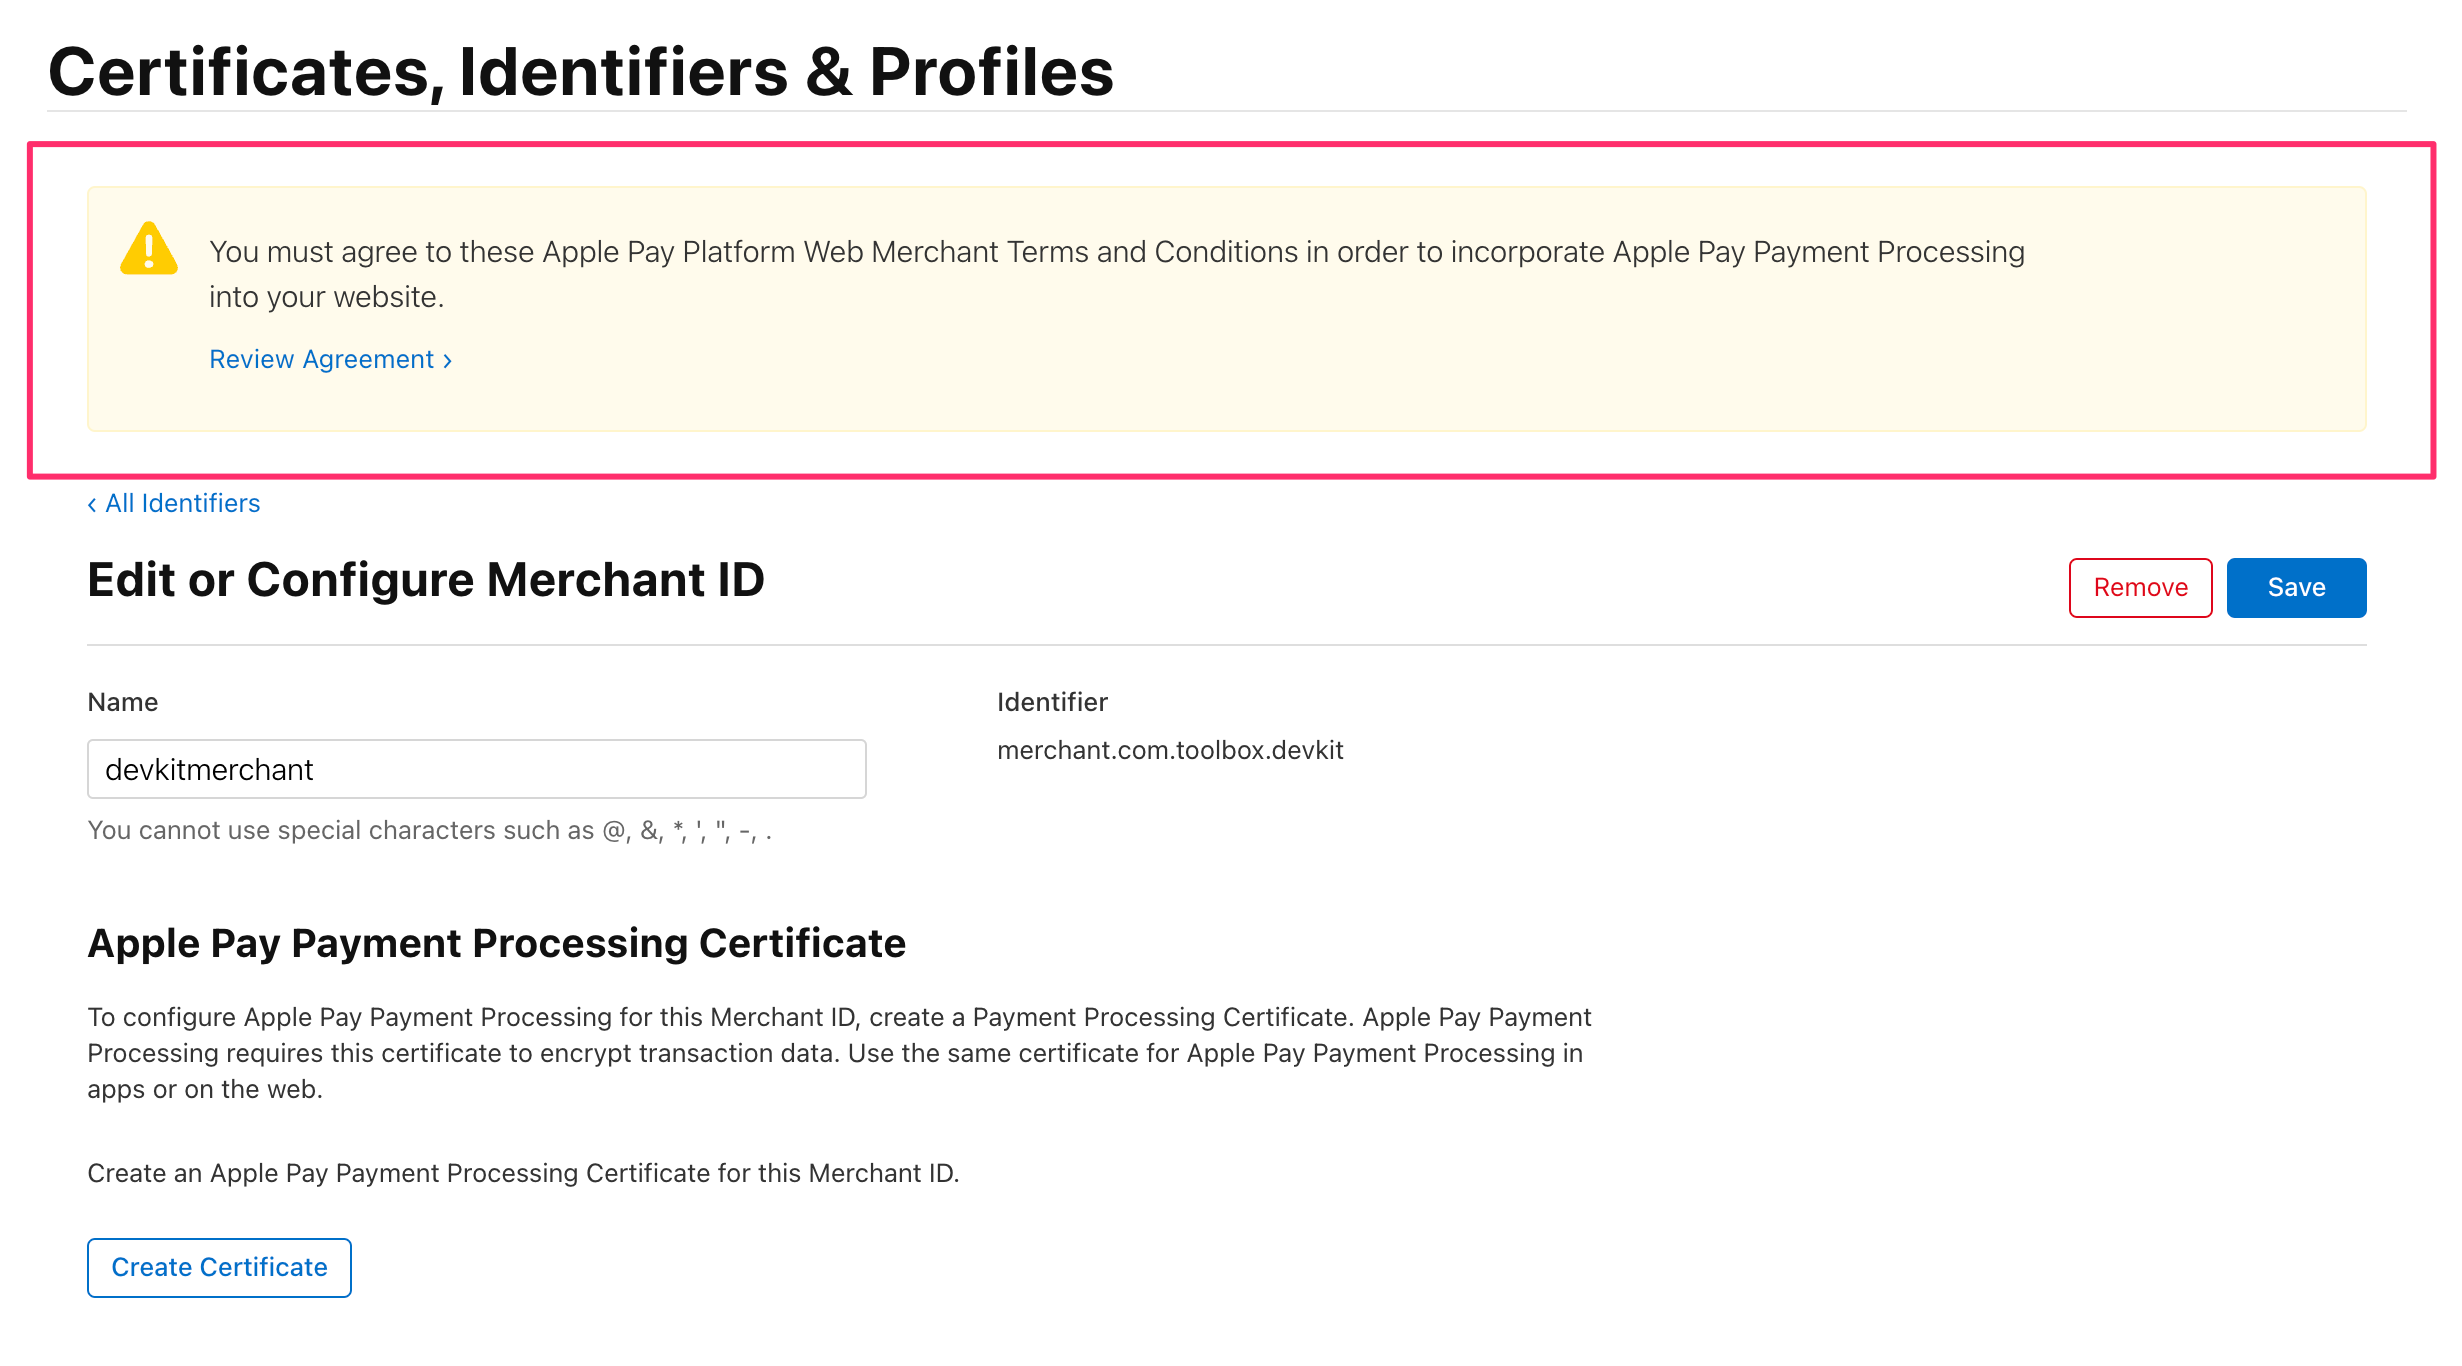
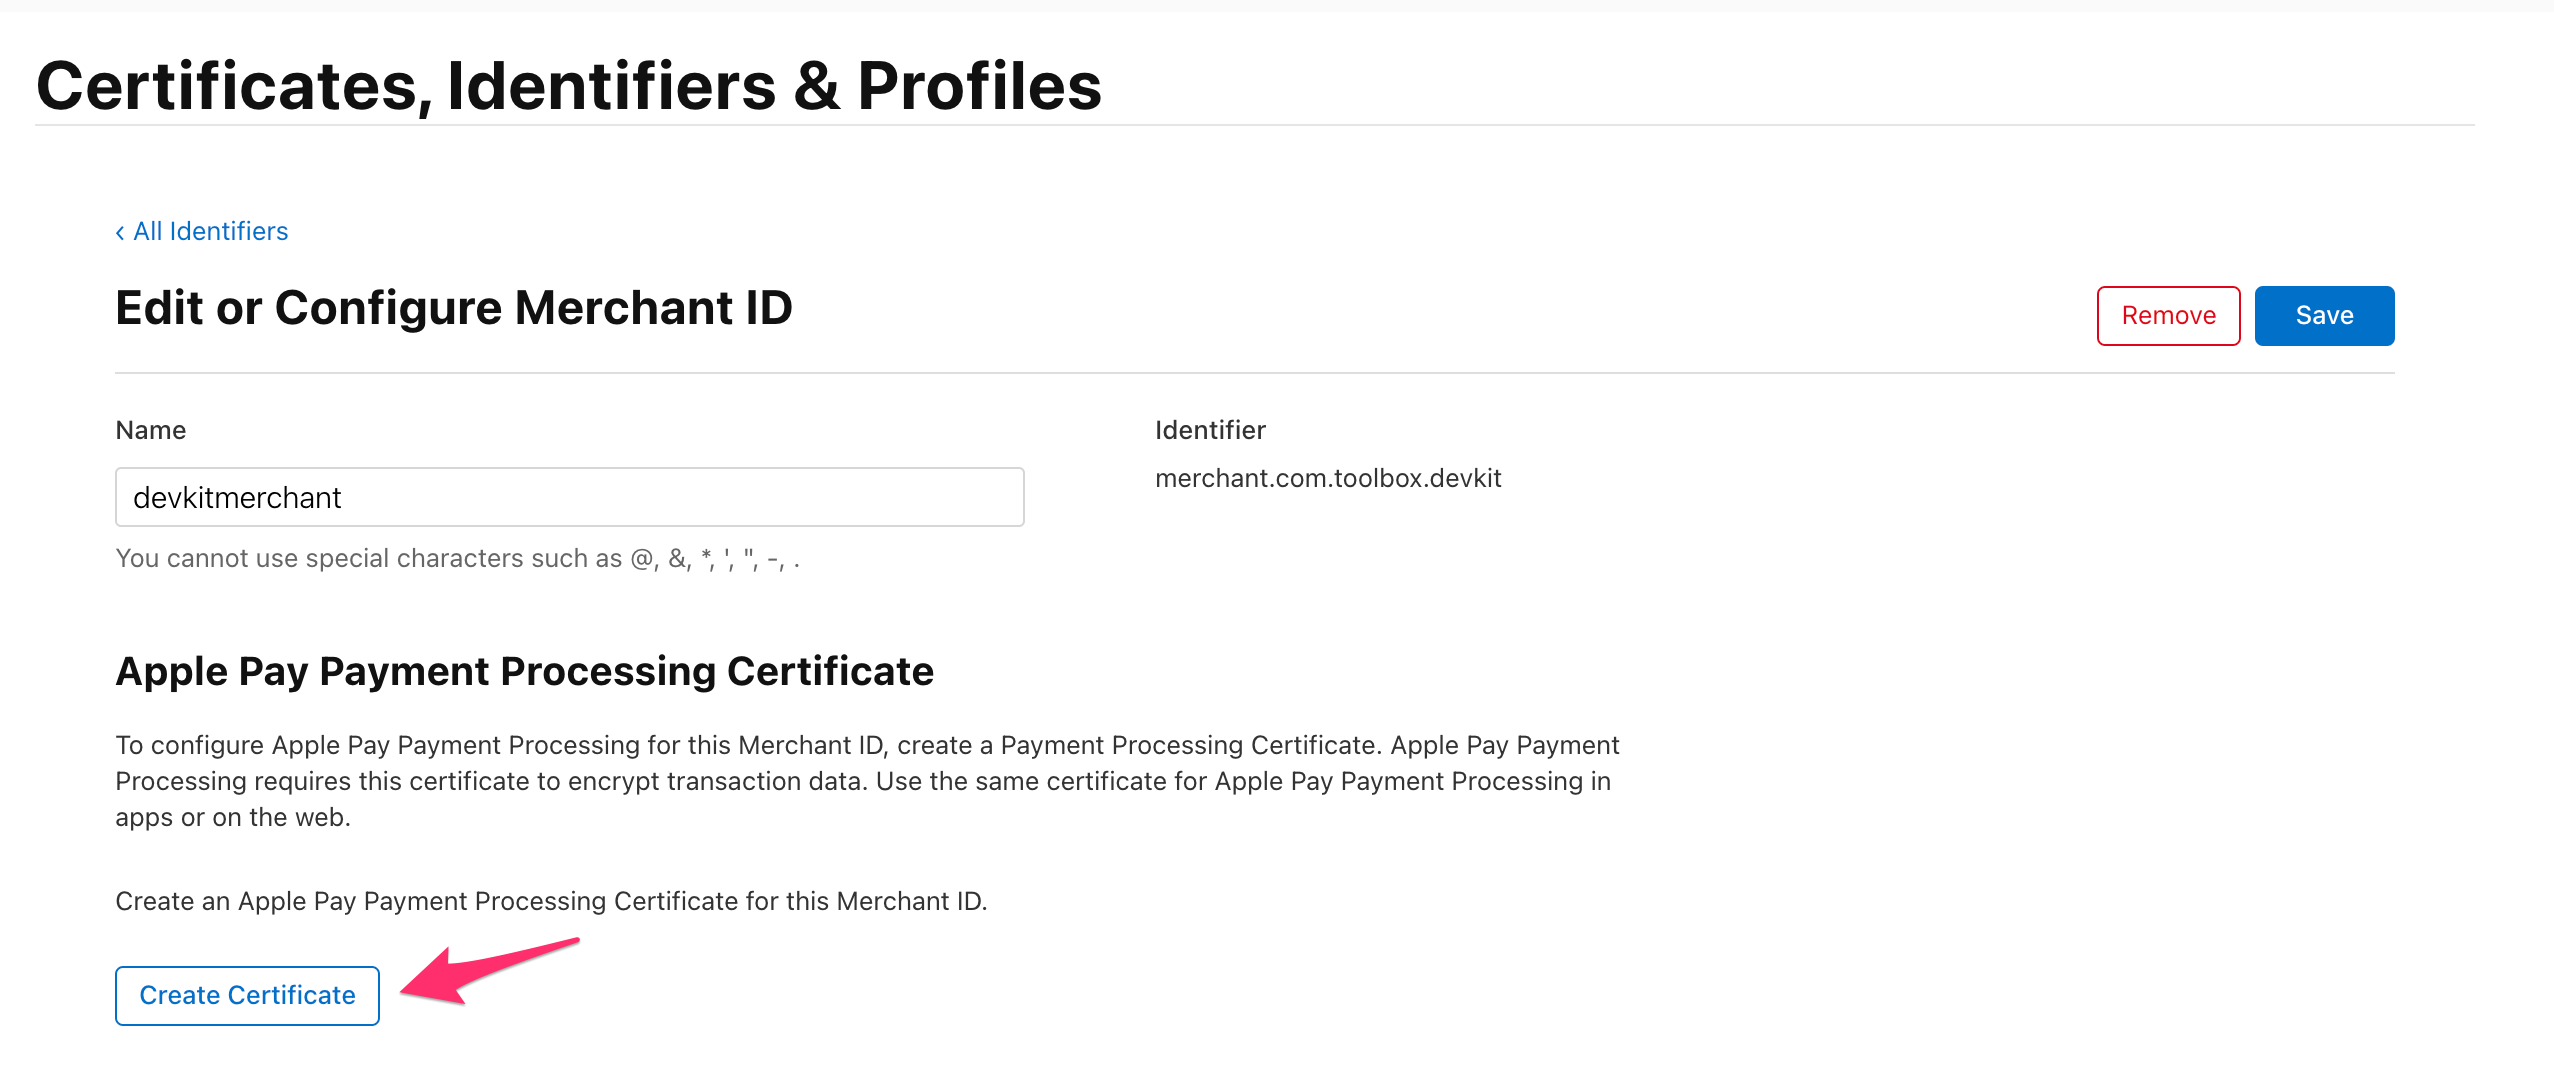
- Under Apple Pay Payment Processing Certificate, click Create Certificate.
- Create a Certificate Signing Request(CSR) with ECC Algorithm and key size of 256bits on your Mac with KeyChain Access.
- Launch Keychain Access on your mac.
- Choose Keychain Access > Certificate Assistant > Request a Certificate from a Certificate Authority.
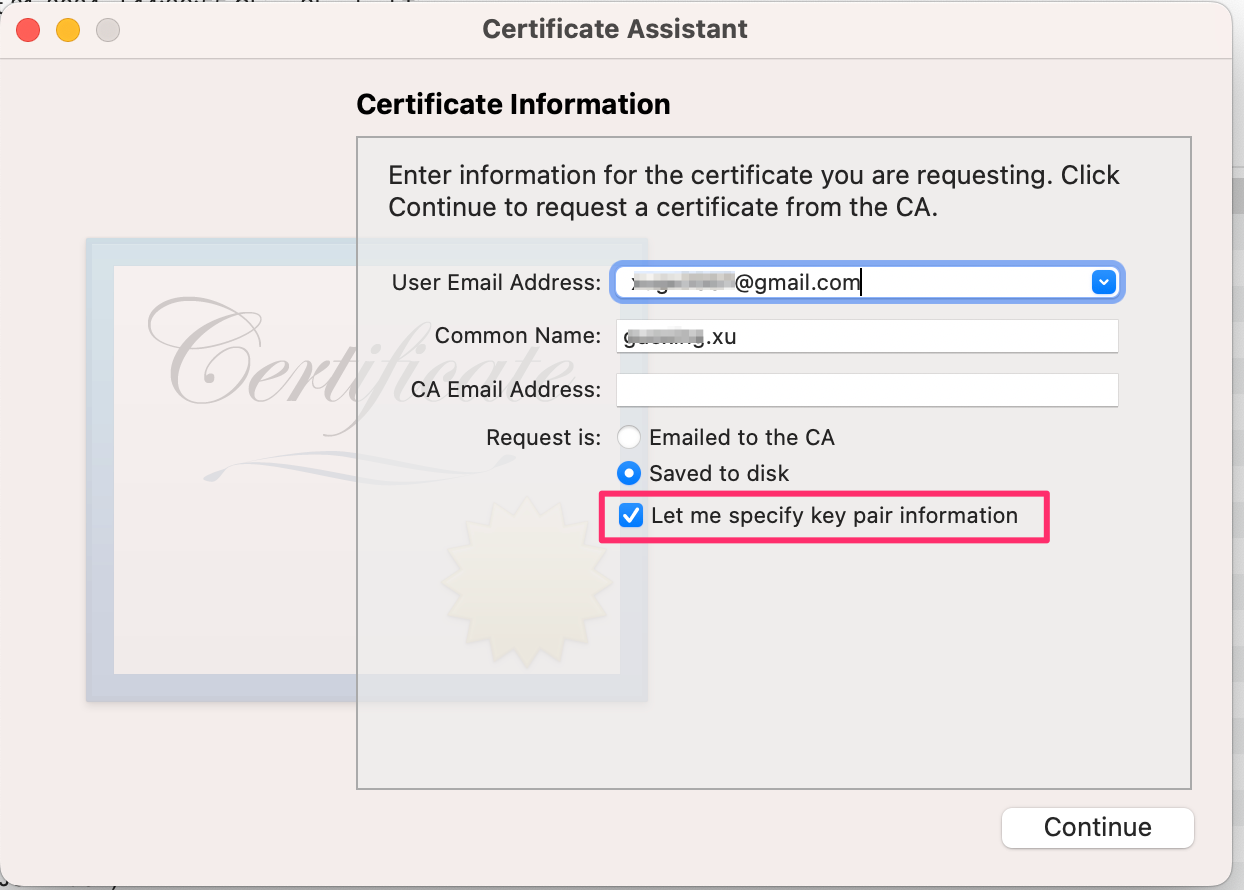
- In the Certificate Assistant dialog, enter an email address in the User Email Address field and enter a name for the key in the Common Name field.
- Leave the CA Email Address field empty.
- In the "Request is" group, select the "Saved to disk" option.
- Select "Let me specify key pair information".
- Click Continue within Keychain Access and select the file location.
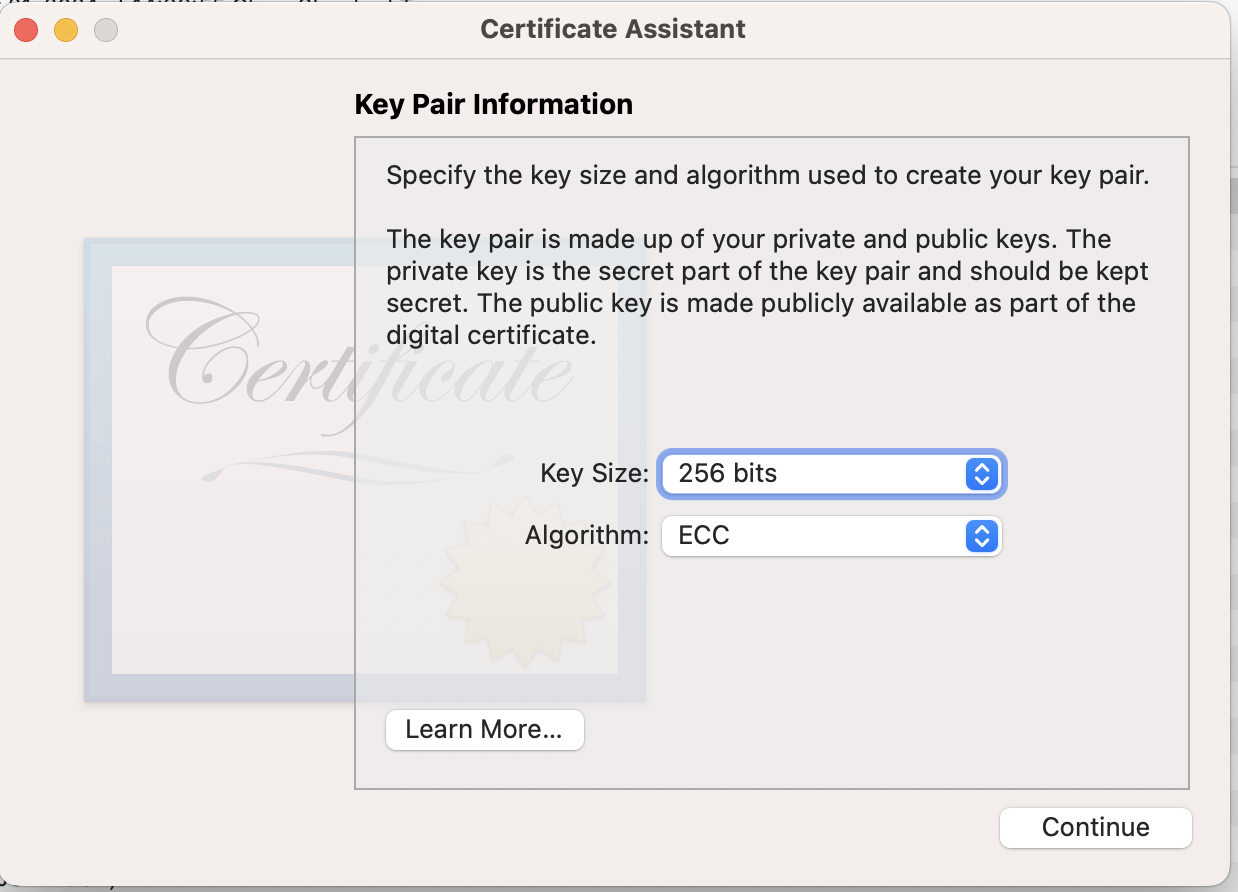
- Set the Key Pair Information: Algorithm: ECC, Key Size: 256 bits
- Click Continue within Keychain Access to complete the CSR generating process.
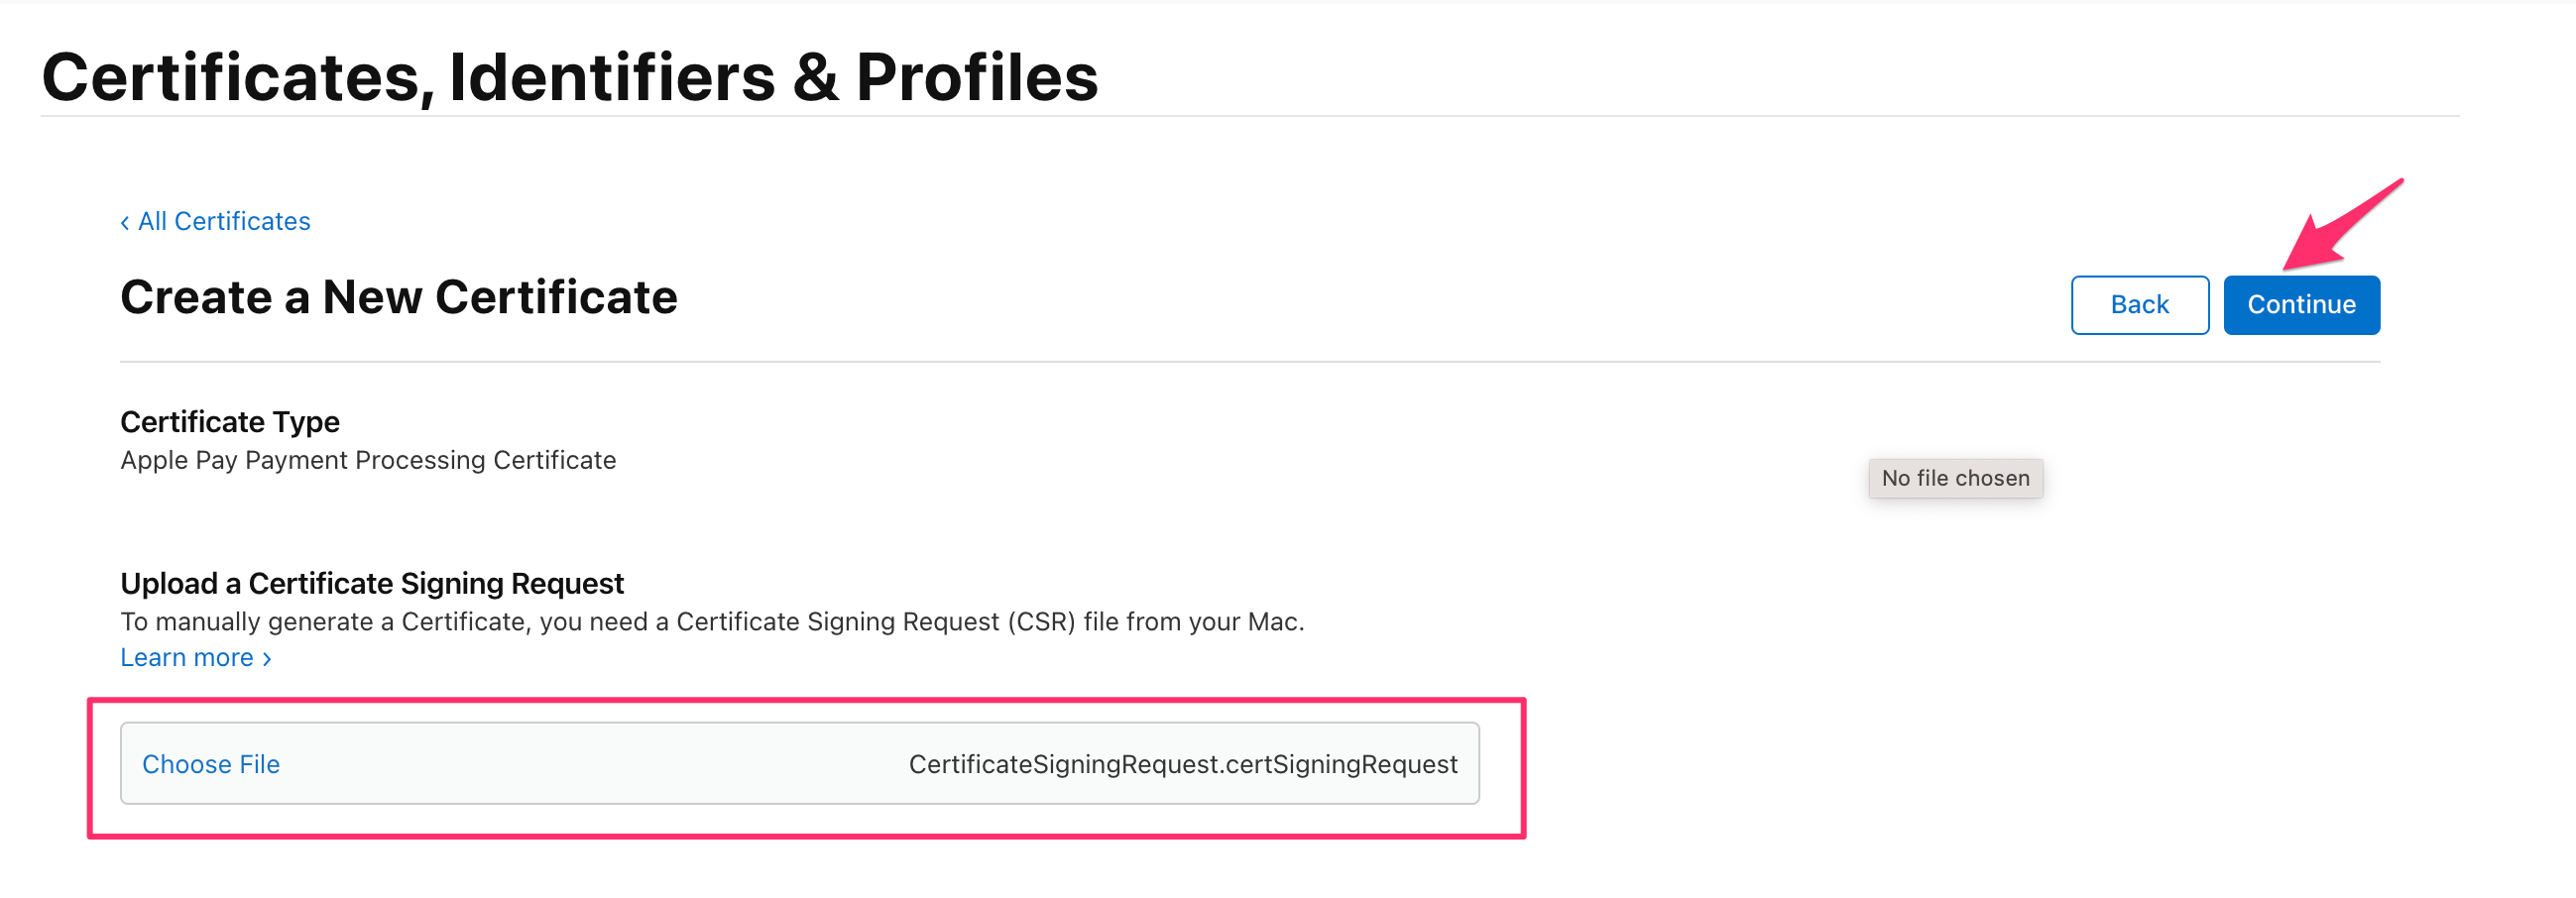
- Upload the Certificate Signing Request(CSR) file ,then Continue.
- Download the
.csrfile on the next page.
- Double click the
.csrfile on your mac to install in Keychain Access.
Step4: Add Apple Pay purchase flow in App
Coming soon!
Step5: Service Side Logic
Coming soon!
Step6: Create a sandbox user to test
Coming soon!
References
- Setting up Apple Pay
- Create a merchant identifier
- Configuring Apple Pay support
- Create a payment processing certificate
- Unable to create a Merchant ID Certificate from an ECC 256 certificate signing request
- CSR generation for Apple Pay Payment Processing certificate
- Create Sandbox Apple IDs
- Sandbox Testing
- Offering Apple Pay in Your App
- Complying with regional regulations
- Payment token format reference
- Apple Pay with SwiftUI
- Implementing Apple Pay with SwiftUI