How to Enable Time Sensitive Notifications on iOS
Time Sensitive notifications were introduced in iOS 15, which can deliver information that demand immediate attention and directly call on the individual to take action in the moment they receive them.
Time Sensitive alerts are always delivered immediately, surfaced above other notifications, and allowed to break through Focus and Do Not Disturb
Step1: Enable Time Sensitive Notifications in App ID Configuration
- Login to your Apple Developr Account
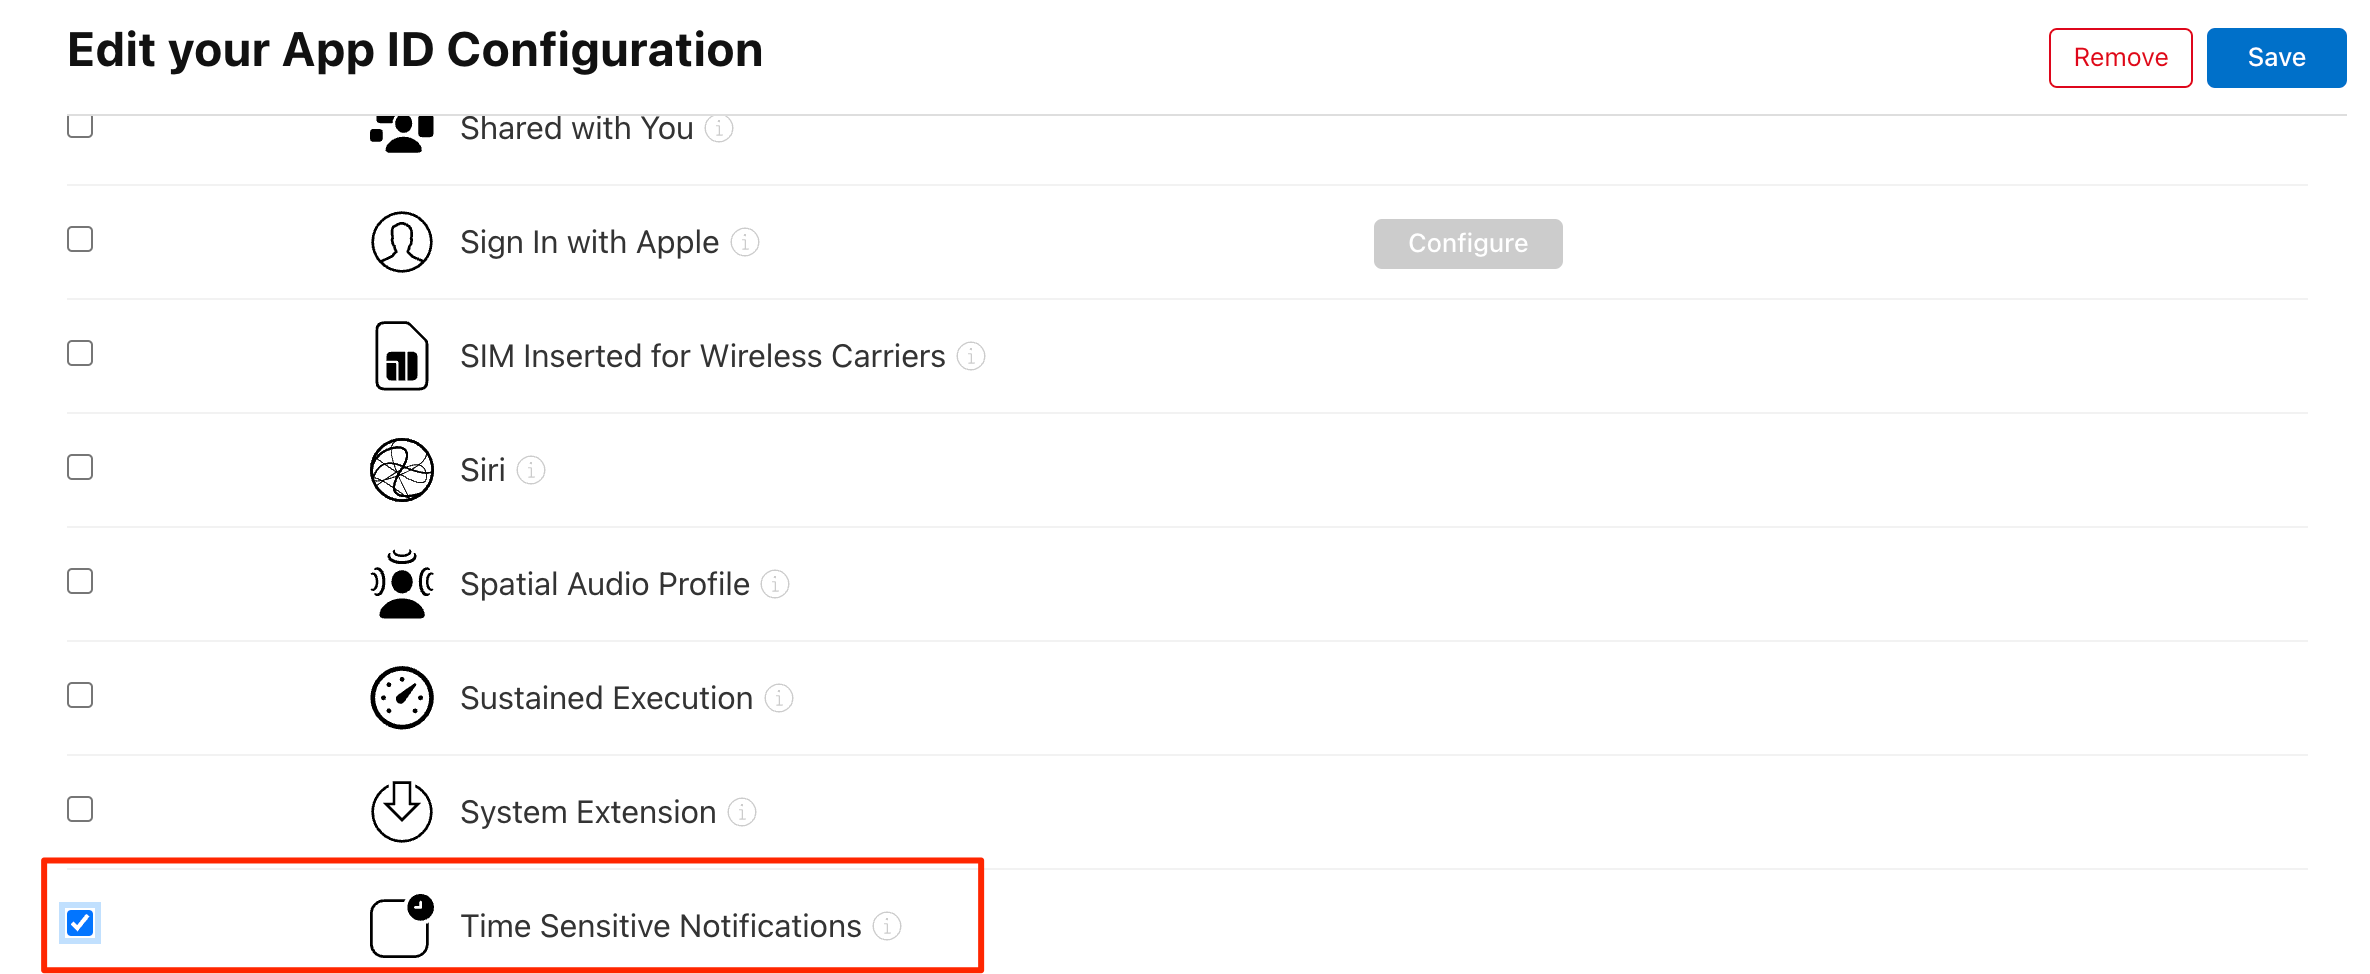
- In the Certificates, Identifiers & Profiles section, Identifiers subsection, select your AppID.
- In the App ID Configuration page, enable
Time Sensitive Notifications, click Save. - If you have a NotificationService AppID, enable
Time Sensitive Notificationstoo. - Regenerate all the provision profiles related to the above AppIDs.

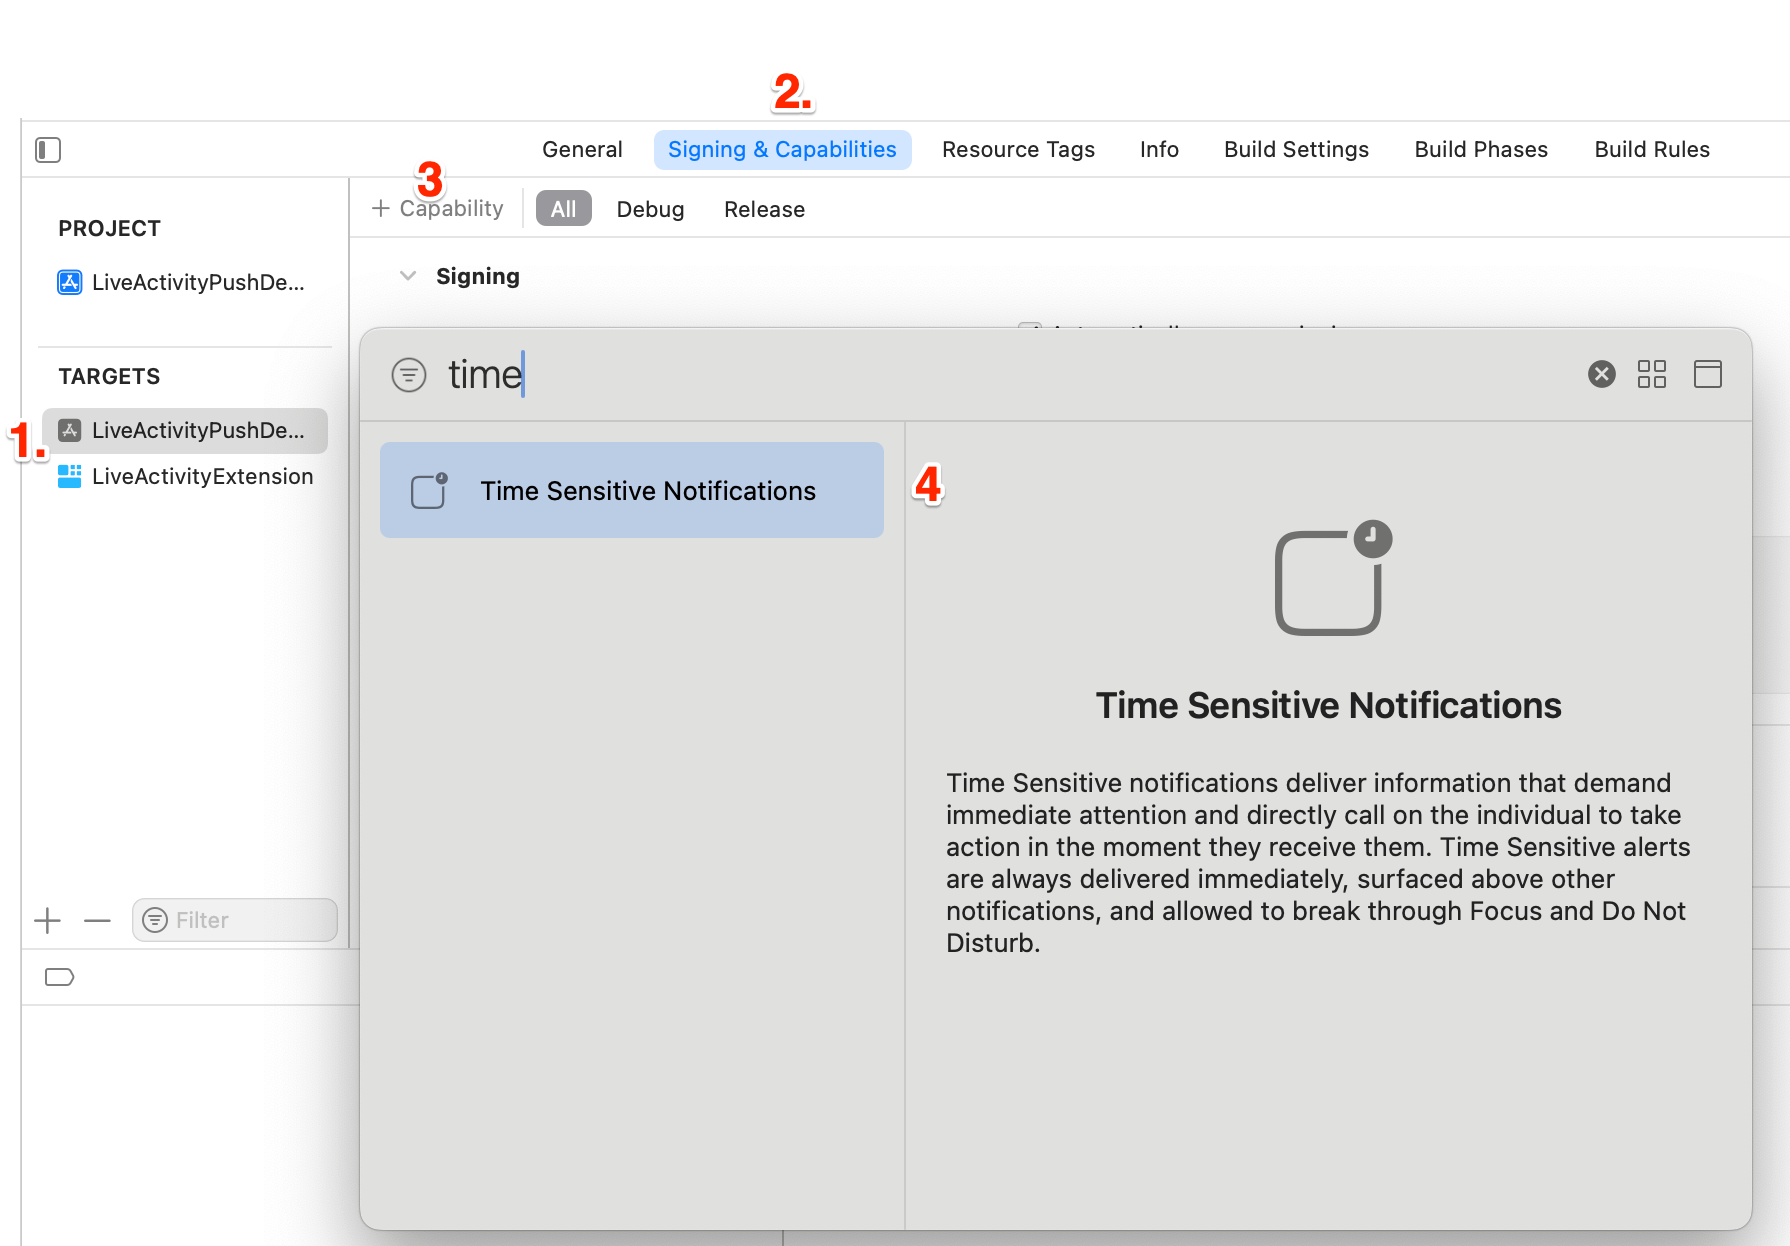
Step2: Add Time Sensitive Notification Capability in Xcode Configuration
- Select your Main Target and Signing & Capabilities panel.
- Click the + Capability button.
- Select
Time Sensitive Notificationscapability.

Step3: Request Notification Permission in You App as Normal
- In your application's code, request push notificaiton permissions as your normally would. The
.timeSensitiveauthorization option is not required.
func application(_ application: UIApplication, didFinishLaunchingWithOptions launchOptions:[UIApplication.LaunchOptionsKey : Any]? = nil) -> Bool {

    let authOptions: UNAuthorizationOptions = [.alert,.badge,.sound]
    UNUserNotificationCenter.current().requestAuthorization(options: authOptions) { (granted, error) in
        print(granted,error ?? "")
    }
    application.registerForRemoteNotifications()

    return true
}

func application(_ application: UIApplication,didRegisterForRemoteNotificationsWithDeviceToken deviceToken: Data) {
    let deviceTokenString = deviceToken.reduce("", { $0 + String(format: "%02X", $1) })
    print("APNs device token: \(deviceTokenString)")
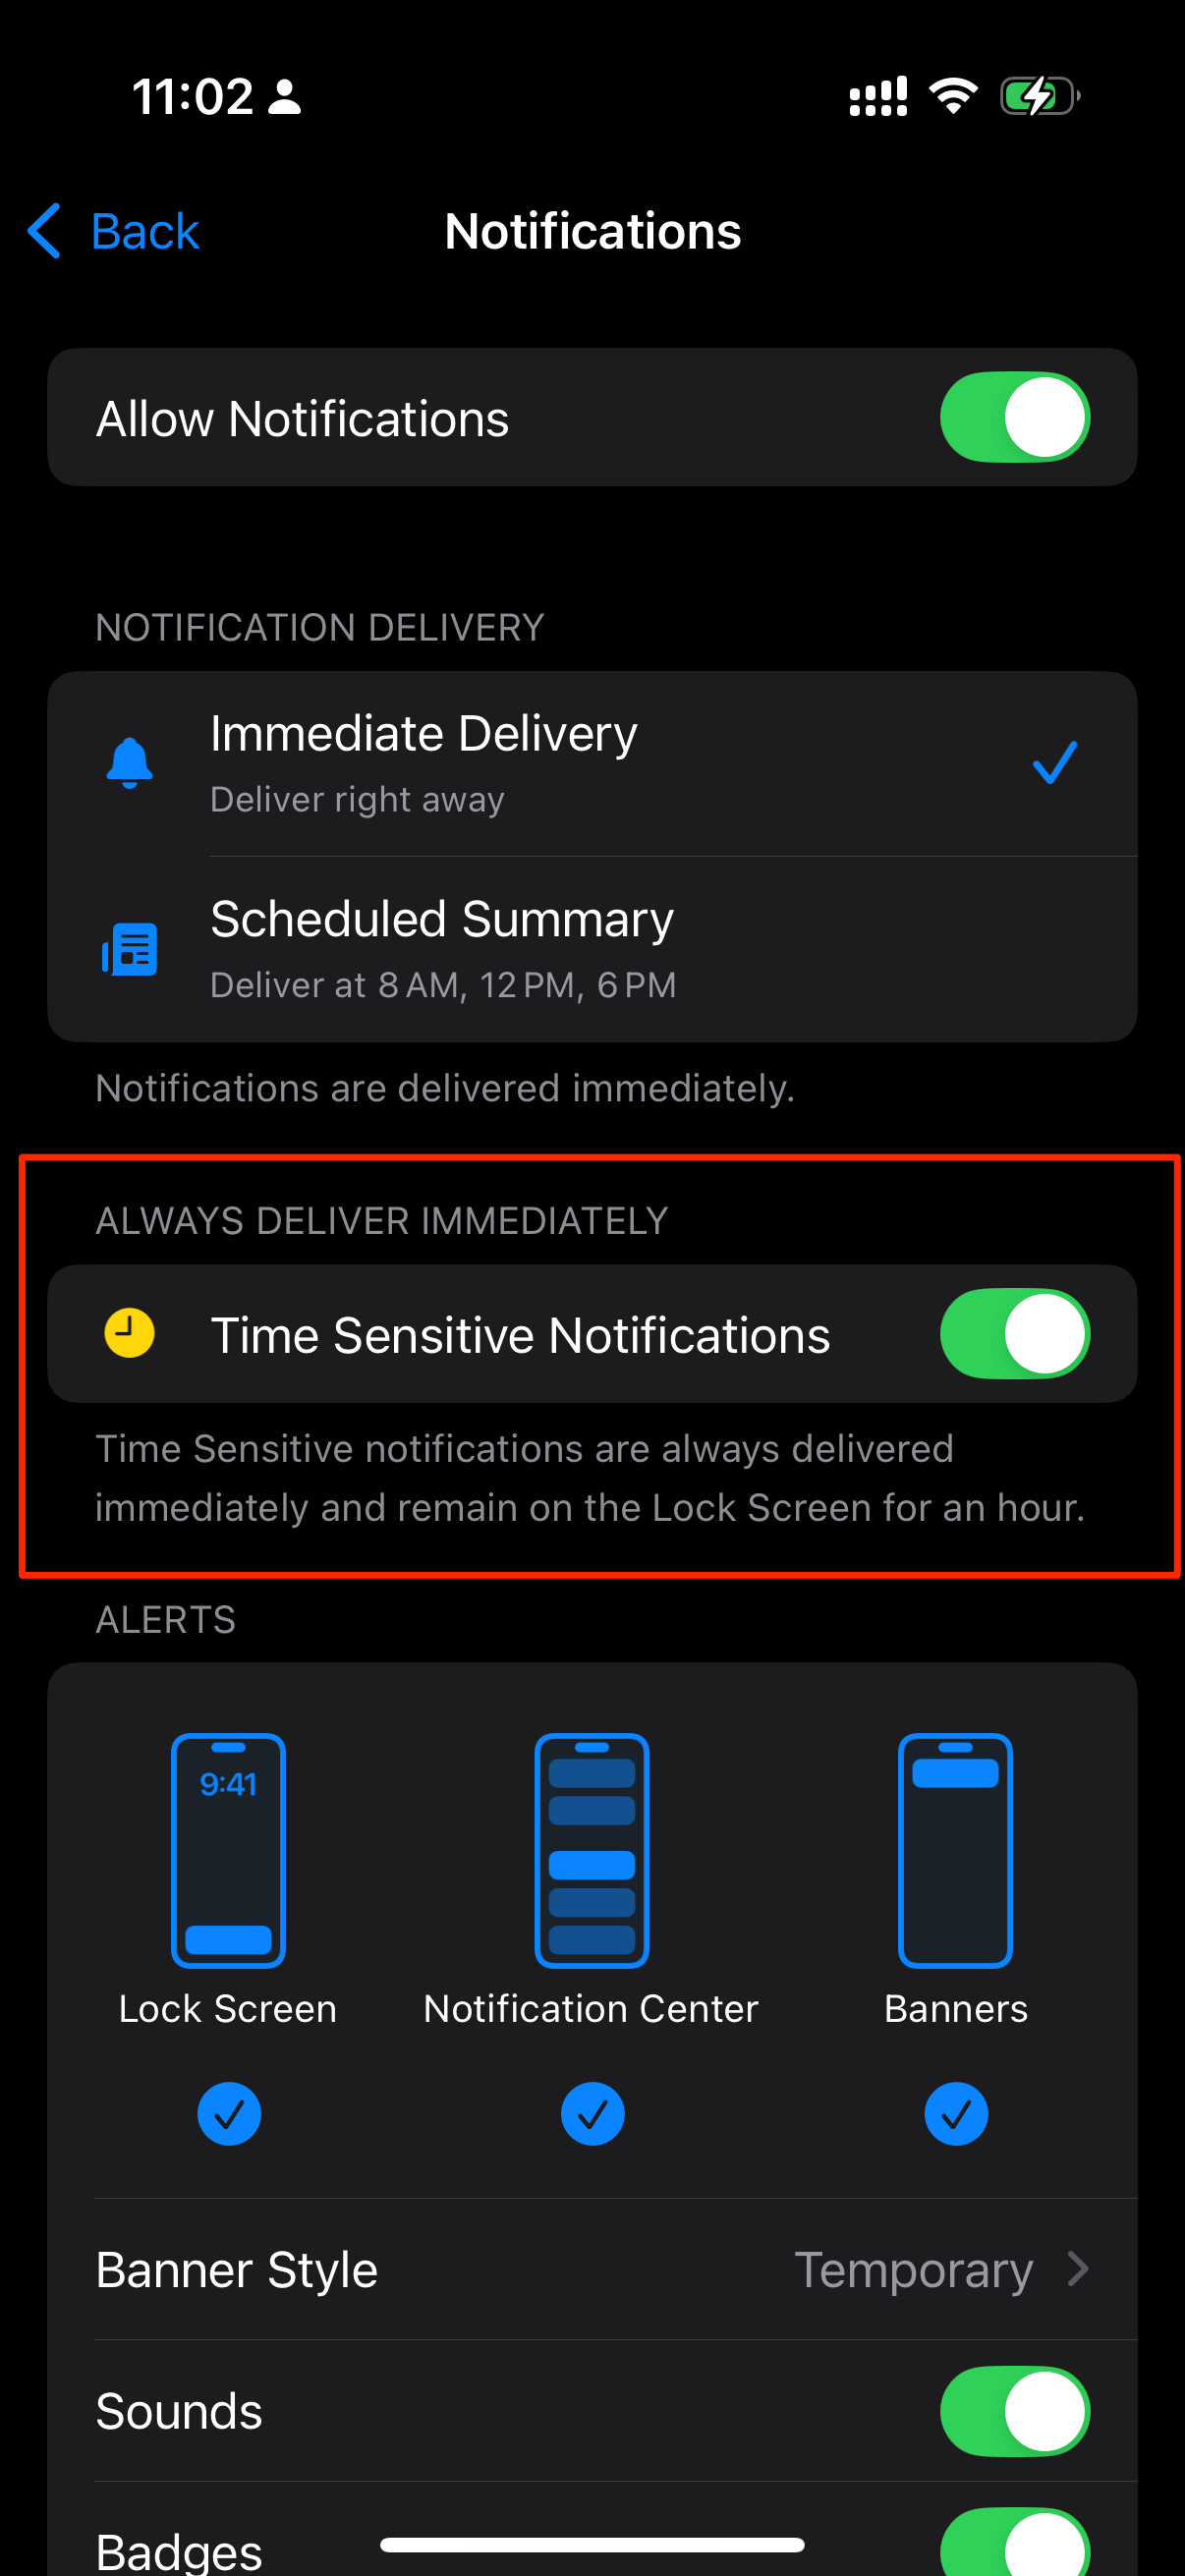
}- Following the running of the application and granting push notification permissions, users can access the app's notification settings page within the device's Settings application. There, they will find that the
Time Sensitive Notificaitonstoggle is enabled.

Step4: Send a Time Sensitive Notification
The notification payload should include the filed "interruption-level"with the value "time-sensitive".
This payload can be sent using either the ApnsPush or your own push notification tool.
{
    "aps": {
        "alert": {
            "title": "Game Request3",
            "subtitle": "Five Card Draw",
            "body": "Bob wants to play poker"
        },
        "interruption-level": "time-sensitive"
    }
}
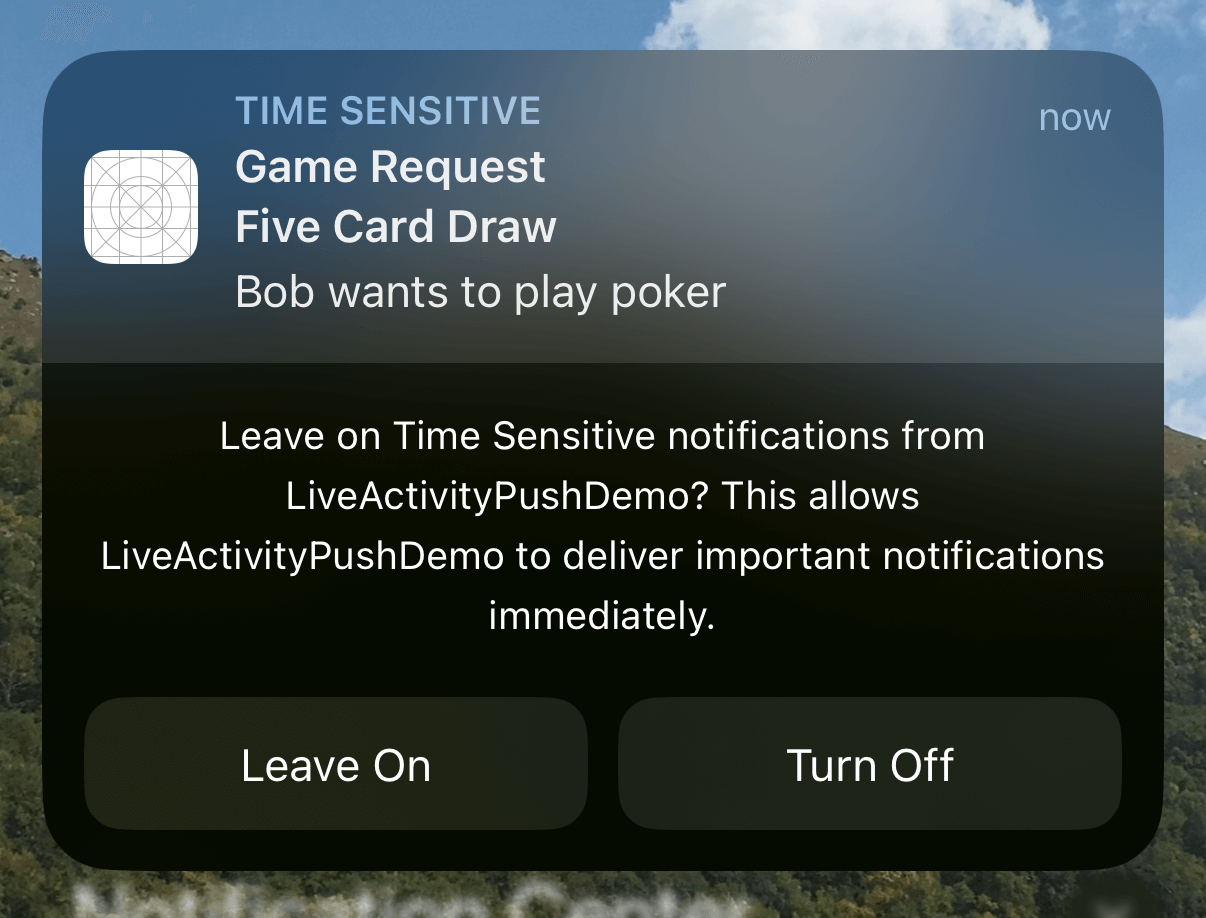
If all conditions are met, your application will receive a time-sensitive notificaiton like this.

Upon receiving the first time-sensitive notification, the system will prompt the user to adjust the Time Sensitive Notificaitons setting if desired.

Disabling Time Sensitive Notificaitons will cause them to be treated as standard notifications, which will not bypass Focus and Do Not Disturb settings.